Building a Simple Project Management Tool With ExpressionEngine
by Ian Ebden in ExpressionEngine.
Firstly I created a document outline that would form the basis of every template:
Notice in the above I’m using “not foo” in the filter menu’s first option value=, and the channel entries’ status= parameter. That’s a neat way of basically saying show all statuses. Nod to @low for suggesting that to me recently.
Job Breakdown
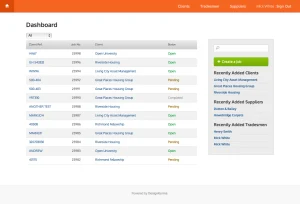
From the dashboard users can click on a job to view a full breakdown, including a green “budget remaining” indicator bar that basically takes Time and Materials totals and works out costs as a percentage of the overall budget (via some nifty SQL). That percentage is then set as the width value of the green bar.
Remaining Pages
Clients, Suppliers and Tradesmen pages are just paginated lists, with a bit of category filtering thrown in. Clicking a title takes you to a single entry page, which is actually a pre-populated SafeCracker edit form, so the client can view and edit details at the same time.
Publishing and editing with SafeCracker
That brings us nicely to the publishing and editing forms. For newbies, SafeCracker is a standalone entry form (SAEF) module that let’s users create and edit entries outside the ExpressionEngine control panel. It can be a tricky customer, and I once used it on a site to manage complex hedge fund information. It nearly killed me. But this is a pretty simple setup.
The Job form had a bit more complexity than the others, so I started with the Clients,Suppliers and Tradesmen forms, which it turns out could all be done with one template (create/index) and the same form. The key lines of code in the create template are:
I’m checking for a “success” segment (shown after an entry has been submitted), and using whatever is in {segment_2} (e.g. /create/clients/success) as a link back. Otherwise load our SafeCracker form, stored as a snippet.
In the {sn_safecracker} snippet I used the IfElse plugin to output the necessary SafeCracker parameters, based on whether this is a publish (segment contains “create”) or edit form:
I’m using URL segments (e.g. “clients” or “tradesmen”) so the form will be generic enough to work for any of my channels. SafeCracker’s {custom_fields} loop will output the necessary fields.
The Job form was a little more complex given the extra fields – dates, checkboxes and Matrix – plus some specific validation rules. But the basics were the same. I simply created an extra condition in {sn_snippet} to check if this was a job entry, and included a hand-coded form instead of using the {custom_fields} loop. The form looks like this:
Form validation
SafeCracker and ExpressionEngine have their own form validation, but I like to add some client-side stuff on top. For a while now I’ve been using Jörn Zaefferer’s jQuery Validation plugin, and using it with SafeCracker is a cinch. If you’re using SafeCracker’s{custom_fields} loop just add {if required} class=“required” required{/if}to your fields. Then, at the bottom of your document add the jQuery Validation script:
Hey presto, client-side form validation on all your required fields.
Building on the basics
The project had a limited scope and budget, so this was a nice simple solution. But there’s no reason why it couldn’t be extended. For example using the Comment module to add/share project notes; Using Matrix for to-do checklists like Basecamp; Create additional member groups to allow clients, tradesmen or suppliers to update their details; Generate invoices, and so on…
Hope you found this useful. Love to hear your thoughts on Twitter @designkarma.
Thanks for reading